

Typography:
A post-data XML file is provided in Doc. zip file. However, you can create a post via the below format. Here is the post format with all codes:Enable Download Button:
Navigate to Blogger > Settings > Scroll Down and enable this setting.Note: Header Download Button can only work on posts that have label 'Resource'.
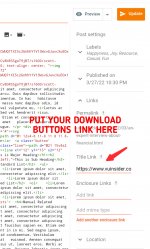
Now you can see a new setting appear in post edit. Simply add link to button from there. *Screenshot is attached.
Page Modes:
You can easily activate any mode with help of labels.Full Page With No Sidebar: Add the label 'Fullpage' to disable the sidebar on posts
Blog Post Mode: Add the label 'Blog' to activate blog post mode.
Threads Posting Mode: Add the label 'Thread' to activate threads mode
Resource Posting Mode: Add the label 'Resource' to activate Resouce download mode.
Sidebar Widget: Popular Posts/Threads
There are three built-in Popular Posts widgets:
- Trending Posts
- Trending Threads
- Trending Resources
1: Trending Posts: Only posts containing label of 'Post' or 'Blog' will be fetched.
2: Trending Threads: Only posts containing label of 'Thread' or 'thread' will be fetched.
3: Trending Resources: Only posts containing label of 'Resource' or 'Product' will be fetched.
Contact Page Configuration
Create a new page with the title 'contact' in blogger and save it without any content. Now edit the page and paste the following code in 'Post HTML Mode'.
Code:
<div class="ContactForm" id="ContactForm1">
  <form name="contact-form">
    <div class="input-area">
      <label>Name</label><input class="contact-form-name" id="ContactForm1_contact-form-name" name="name" type="text" value="" /></div>
    <div class="input-area">
      <label>Email<span>*</span></label><input class="contact-form-email" id="ContactForm1_contact-form-email" name="email" type="text" value="" /></div>
    <div class="input-area">
      <label>Message<span>*</span></label><textarea class="contact-form-email-message" id="ContactForm1_contact-form-email-message" name="email-message"></textarea></div>
    <div class="input-area">
      <input class="contact-form-button contact-form-button-submit" id="ContactForm1_contact-form-submit" type="button" value="Submit" /></div>
    <div class="notif-area">
      <p class="contact-form-error-message" id="ContactForm1_contact-form-error-message"></p>
      <p class="contact-form-success-message" id="ContactForm1_contact-form-success-message"></p>
    </div>
  </form>
</div>
<script src="https://www.blogger.com/static/v1/widgets/2271878333-widgets.js"></script>
<script>//<![CDATA[
if (typeof(BLOG_attachCsiOnload) != 'undefined' && BLOG_attachCsiOnload != null) { window['blogger_templates_experiment_id'] = "templatesV1";window['blogger_blog_id'] = 'xxxxxxxxxxxxxxxx';BLOG_attachCsiOnload(''); }_WidgetManager._Init('//www.blogger.com/rearrange?blogID\x3dXXXXXXXXXXXXXXX','//blog.pakthemes.com/','xxxxxxxxxxxxxxx');
_WidgetManager._RegisterWidget('_ContactFormView', new _WidgetInfo('ContactForm1', 'footer1', null, document.getElementById('ContactForm1'), {'contactFormMessageSendingMsg': 'Sending...', 'contactFormMessageSentMsg': 'Your message has been sent.', 'contactFormMessageNotSentMsg': 'Message could not be sent. Please try again later.', 'contactFormInvalidEmailMsg': 'A valid email address is required.', 'contactFormEmptyMessageMsg': 'Message field cannot be empty.', 'title': 'Contact Form', 'blogId': 'xxxxxxxxxxxxxxxx', 'contactFormNameMsg': 'Name', 'contactFormEmailMsg': 'Email', 'contactFormMessageMsg': 'Message', 'contactFormSendMsg': 'Send', 'submitUrl': 'https://www.blogger.com/contact-form.do'}, 'displayModeFull')); //]]></script>
*Find and replace 'XXXXXXXXXXXXX' with your Blog ID. Save it and you're done.
Ads Placements:
Most ads can be placed anywhere you like from the Layout Menu in blogger. Ads inside the post container can be placed by editing the HTML code. To do that, search 'Top article ad', 'Bottom article ad', 'Post Comments ad' in HTML File and replace Ads with your Ads.Widgets Management:
All widgets can be modified accordingly. Just remember to select only one label while creating the node.Attachments
Last edited: